Here are the simple steps:
1. Collect old crayons and remove the paper. Greg and I used exacto knives to slice the paper and peel it off. It was difficult to peel the paper off of the really old crayons, so we just tossed those in the garbage. I would recommend using and old cutting board or mat as your work surface.
2. Sort the crayons into muffin tins or small containers by color.
3. Use an exacto knife and old cutting board to break the crayons in 1/2 inch pieces. The smaller and more uniform the crayon bits are, the better they will melt in the oven. Pre-heat the oven to 200 degrees during this step.
Add the crayon bits to a silicone baking mold. I found mine in the dollar section at Target. You could also use a regular or mini muffin tin to make circular crayons.
You can add bits of crayon that are all the same color to create a solid color crayon, or vary the colors to create a swirl crayon. I liked the way the light green and dark green crayon pieces mixed to created a swirl crayon.
4. Place the mold on a baking sheet and bake in the oven for 20-25 minutes (200 degrees). The crayon bits should be completly melted when finished. Let cool on a cooling rack for several hours, or let the tray cool for 10 minutes and then place in the freezer for 30 minutes. When you peel the mold back you will get these beautiful crayons!
I had inspiration to make these from this blog post here. I have also read about similar ideas online that suggested using only Crayola crayons, due to the high quality of wax.
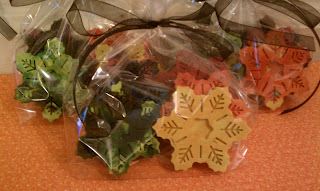
 I know some little ones that will love these snowflake crayons! Here is what I did to package the crayons as gifts.


No comments:
Post a Comment